System Documentation
Frequently Asked Questions (FAQs)
Can I test this asset before I purchase?
Where can I find more learning resources about the system?
Are the previous versions of the system still available
for download?
Where can I find the system roadmap containing future
plans?
After modifying a structure I am getting some errors, is
there a way to fix it?
Quick Overview of the System
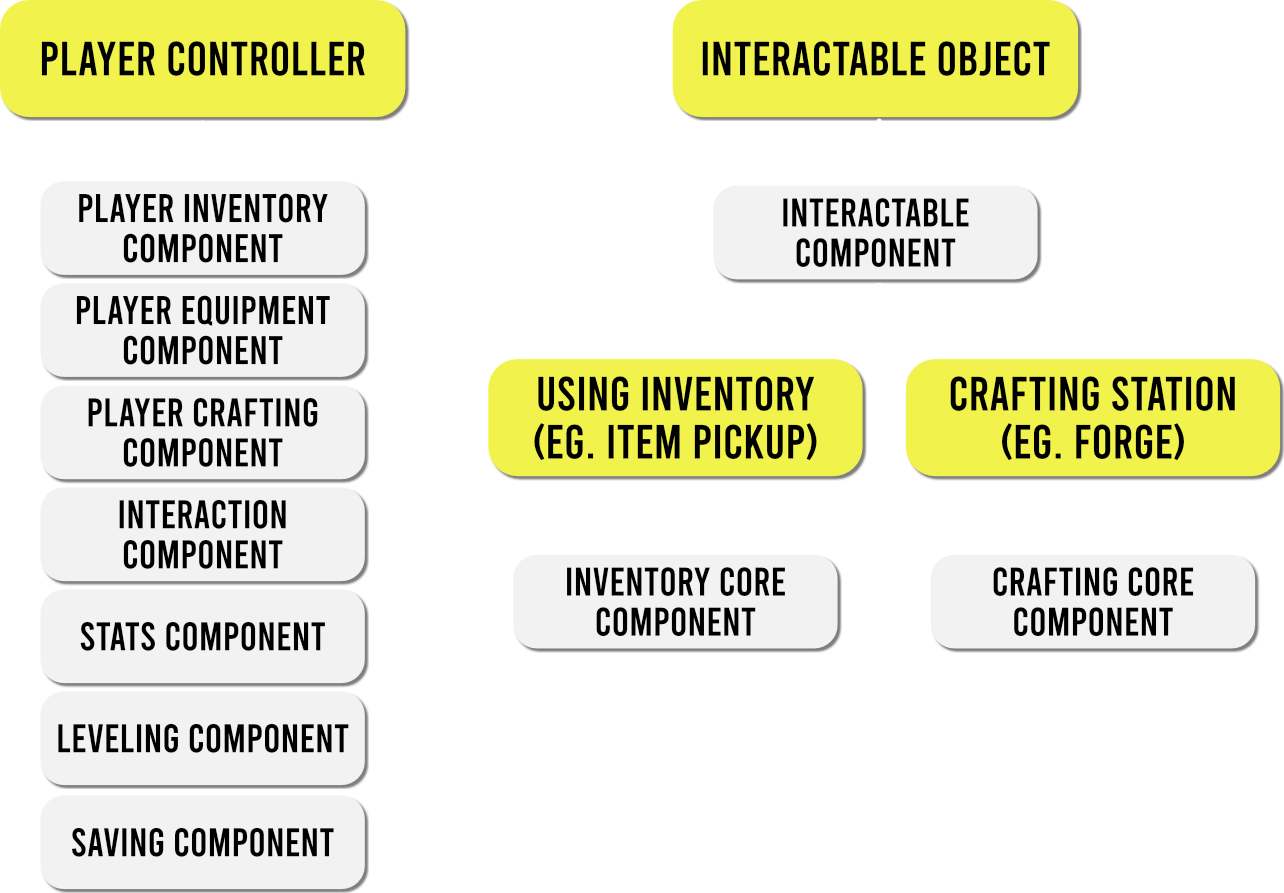 Component tree in the system
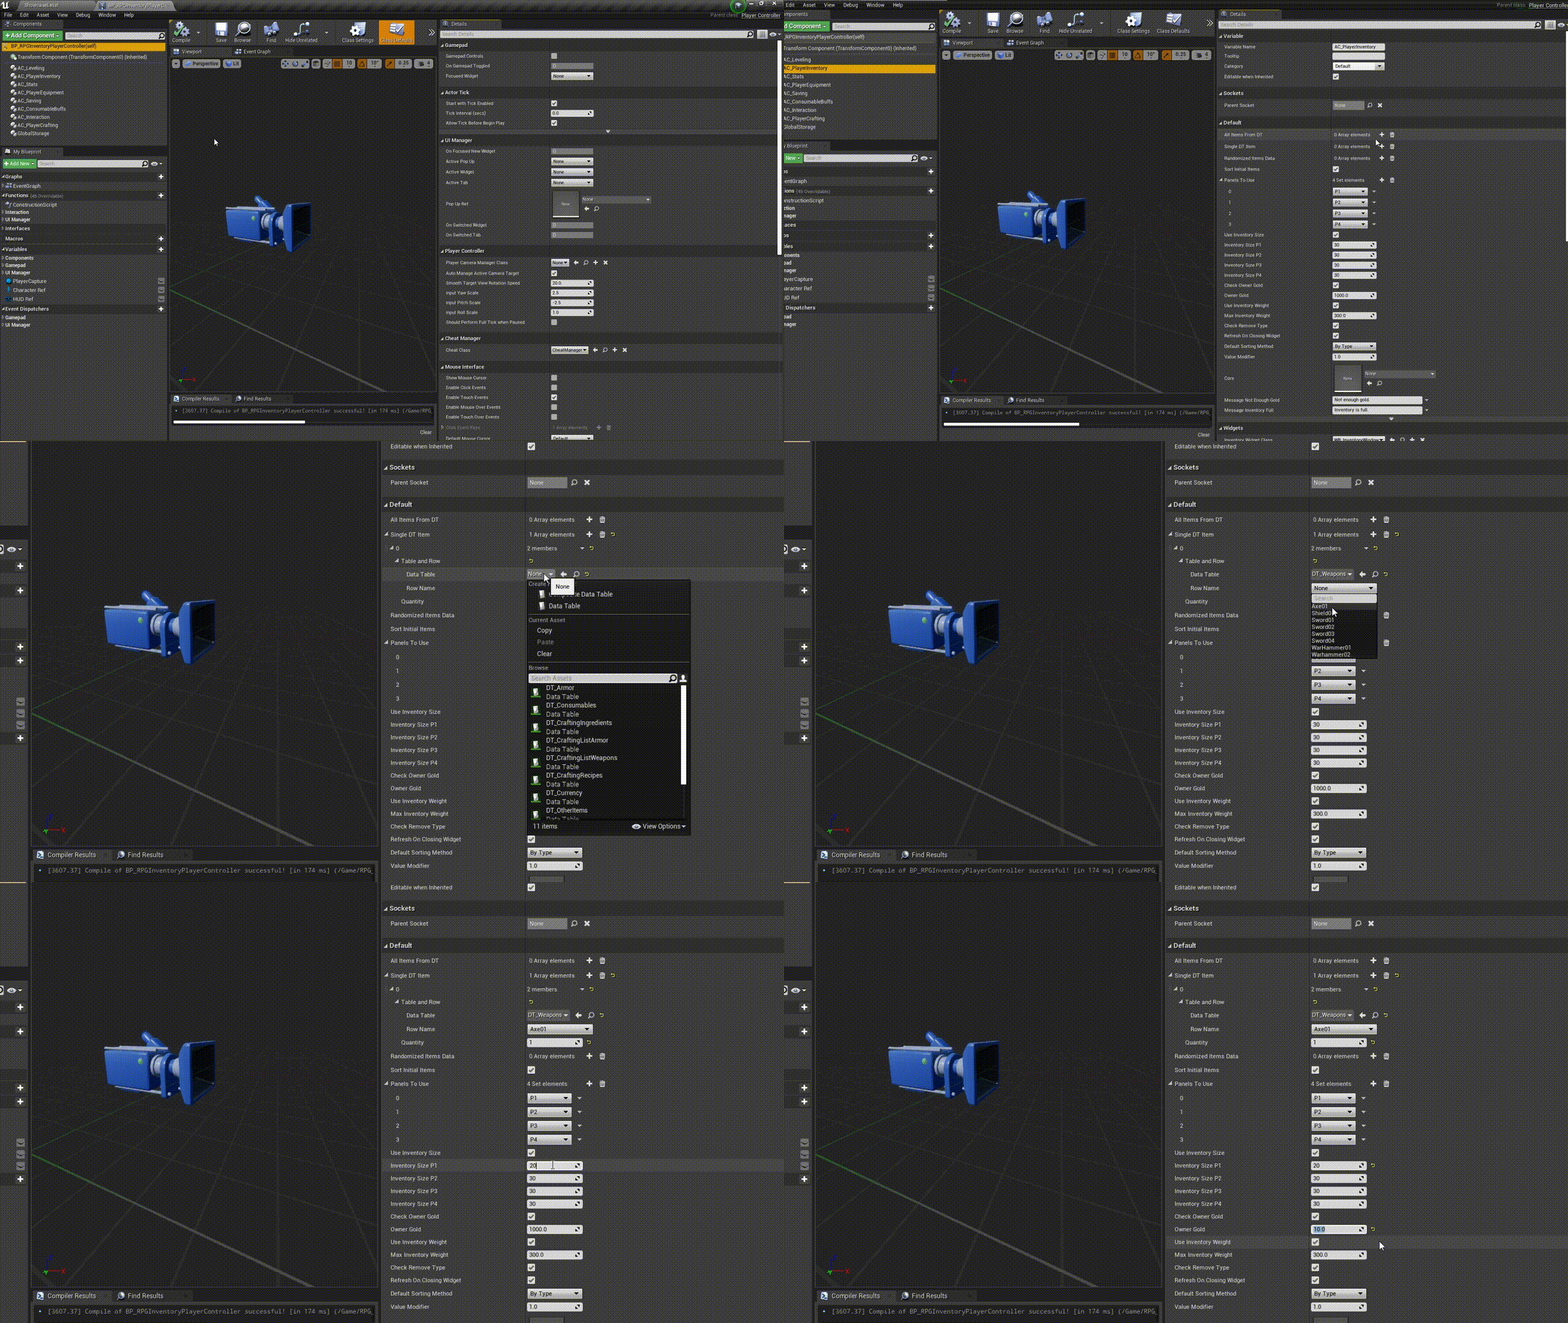 Changing Component parameters on a Player Controller
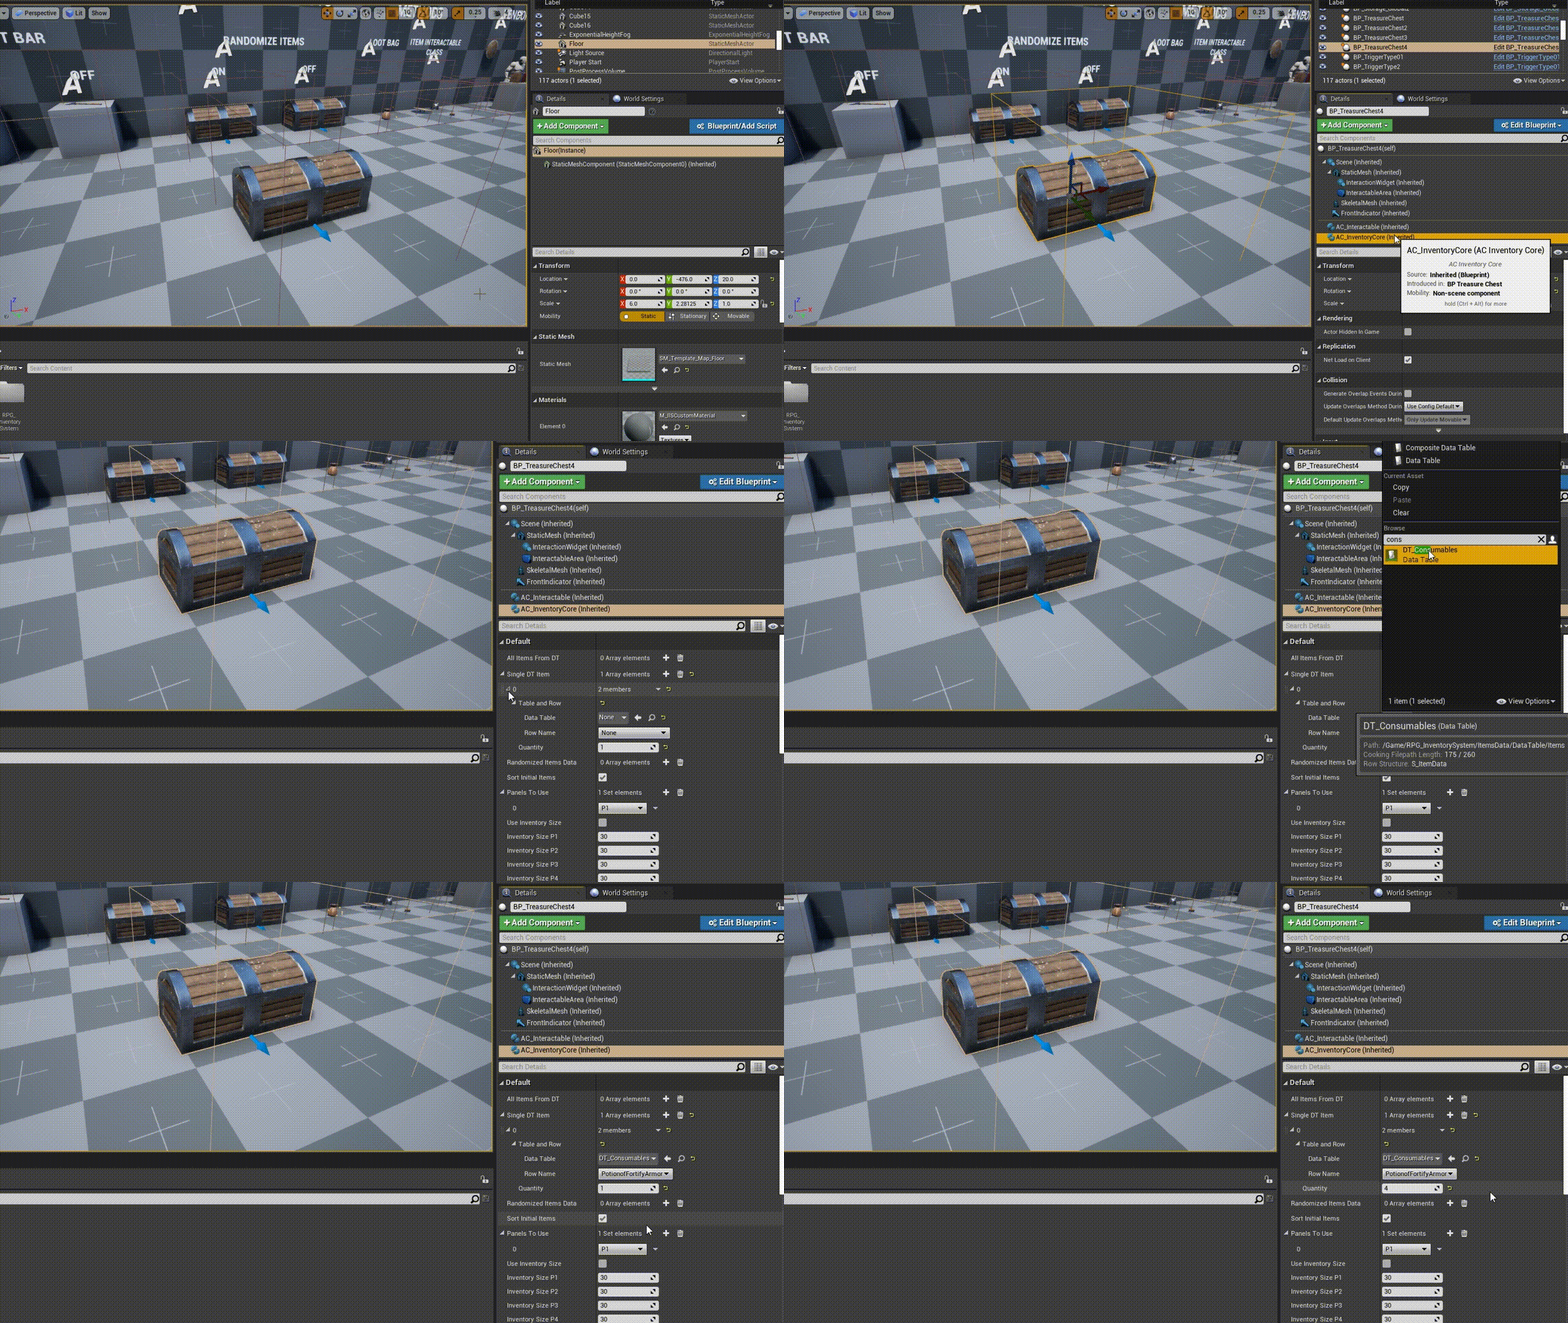 Changing Component parameters on an actor in the level
 Storing Player Inventory Component on Widget Construct
Event
 Retrieving Inventory from current Interactable Object
 Using utility nodes from Macro Library
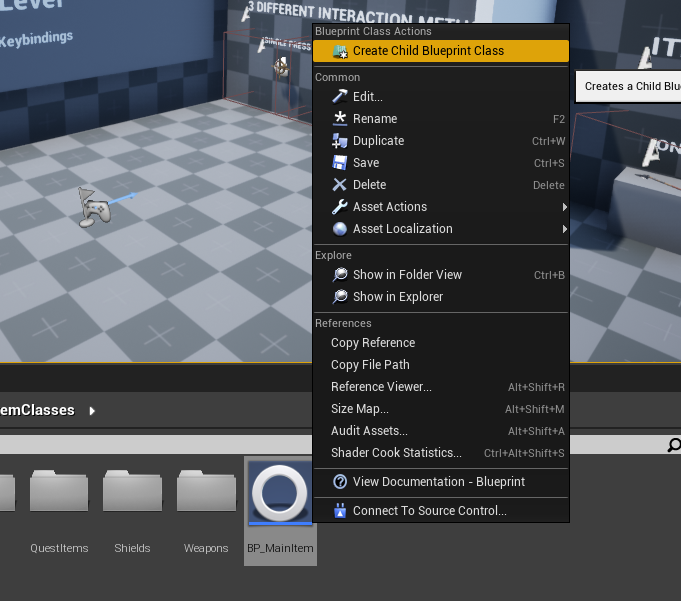 Creating new Item Class derived from 'BP_MainItem'
 Filling Item parameters inside the Class Defaults tab
 Adding new Item (ID, Slot & Class) to the Data Table
 Updating Armor part happens inside RPG Inventory Character
 Equippable Actors can use multiple Slot associated sockets
 Example of how an equipped weapon sockets can be switched
in runtime
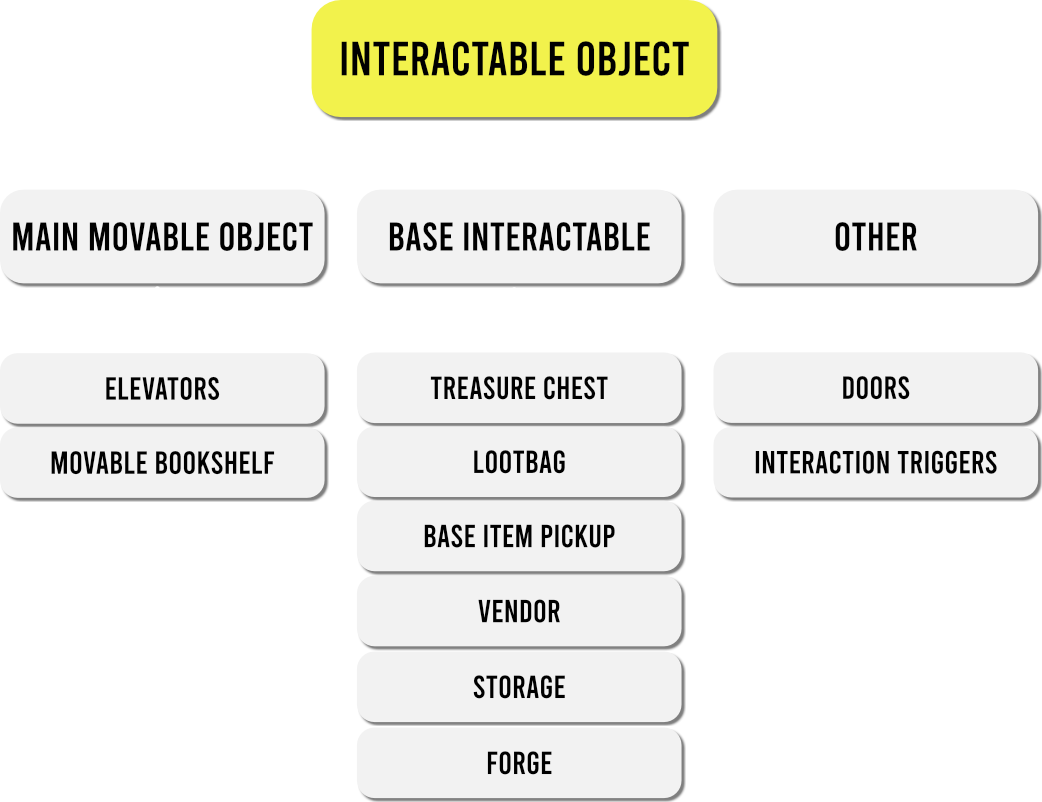 Predefined Interactable Objects Tree
 Customizable parameters on Interactable Component inside
of an Actor
 Start, End and Remove Interaction Inteface Events inside
of an Interactable Actor Class
The system consists of several Actor Components, each of
them is responsible for handling different functionality.
Since they are components they can be attached to other
actors. In the system they can be divided by: the ones added
to the Player and the ones added to the Interactable
Objects. Their default parameters can be easily
customised by selecting them, either inside of a Blueprint
class or Actor in the level.
To retrieve certain component from the PlayerController use
the Components Manager Interface, by calling a specified
Getter function it will output the wanted Component
Reference. Make sure to provide the Player Controller as the
Target parameter (this can be done by either calling a Get
Player Controller or inside the widget use Get Owning Player
node). In order to get a specified Component from the
currently Interacted Object call Get Current Interactable
Object (Target = PlayerController) then from the Output call
Get Component by Class with a specified Component Class
(i.e. InventoryCore Component). System is also using some
handful macros like Is Item Class Valid? to quickly check if
the ItemData is for example not empty.
Items in the system are represented as Structure Datas, that
consists of runtime modifiable elements, one of which is the
Item Class. It contains many Item defining parameters that
are considered as read-only (non-modifiable in runtime) and
are retrieved by getting the Object Class Defaults. Note
that there's no Object Construction nodes to keep it more
performant. In order to add new item to the project it is
required creating new object derived from BP_MainItem and
assigning that newly created class inside one of the Items
Data Tables.
Items can be attached to the Player either by setting new
Skeletal Mesh attached to the Character (mainly armor parts)
or by Spawning new Equippable Class and attaching it to a
socket on a Character Skeleton (mainly weapons). Equippable
Actors uses Combat and Non-Combat socket names (defined in
class defaults), they can also be attached to a specified
socket. This provides an easy way of for example equipping
and sheathing your weapon.
The system already has couple of predefined Interactable
Actors. The concept is to use the Interactable Component and
communicate with the Owning Actor by using Blueprint
Interface Events. The main Blueprint Class that other
Interactable Objects can be derived from is called
'BP_BaseInteractable' - few classes are using it as their
parent, but that's not required (Interaction can be added to
any actor, without the need of re-parenting, check Adding
Interaction to Actor guide). The most important events
called inside the Interactable Object are separated onto 3
stages: Start Interaction | End Interaction | Remove
Interaction. The Actor can become Non-Interactable at any
time, by toggling an IsInteractable boolean.
Inventory System
 Inventory Component Tree for Player and Interactable
Object
 Overriding a function inside PlayerInventory Component
 Treasure Chest and Vendor - Inventory parameters
comparison
 Transfer Item from Inventory graph
 Transfer Item from Inventory (Server call)
 Transfer Item from Inventory (PlayerInventory) function
flowchart
 Transfer Item from Inventory (Server call)
 Transfer Item from Inventory (Server call)
 Override Player Inventory Delegate inside Player
Controller
 Bind Event Dispatchers inside Widget (PlayerInventory in
this case)
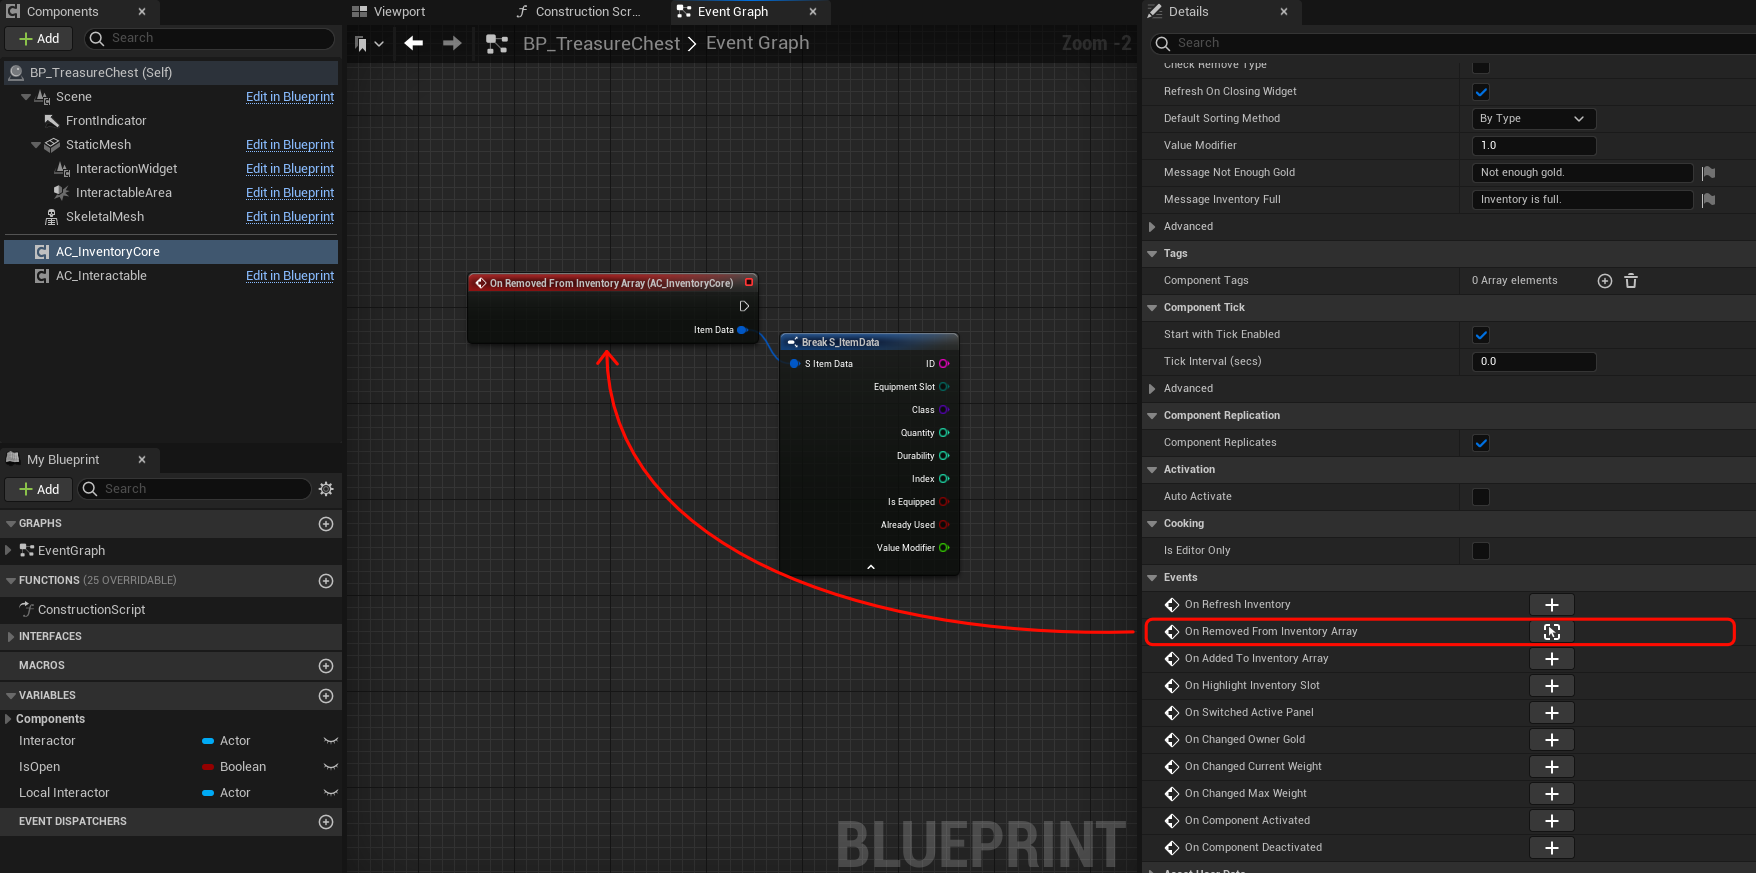 Override InventoryCore Delegate inside Interactable Actor
 Different methods of adding initial items to the inventory
component
 InventoryCore is using only 1 Panel to store the Items in
the array
 Player Inventory is using 4 Panels, each has individual
Inventory Array
 Basing some Widget functionality on Inventory Panel
enumeration
 Changing Inventory Sizes in Class Defaults
 Building Inventory Array base on 'Use Inventory Size'
boolean
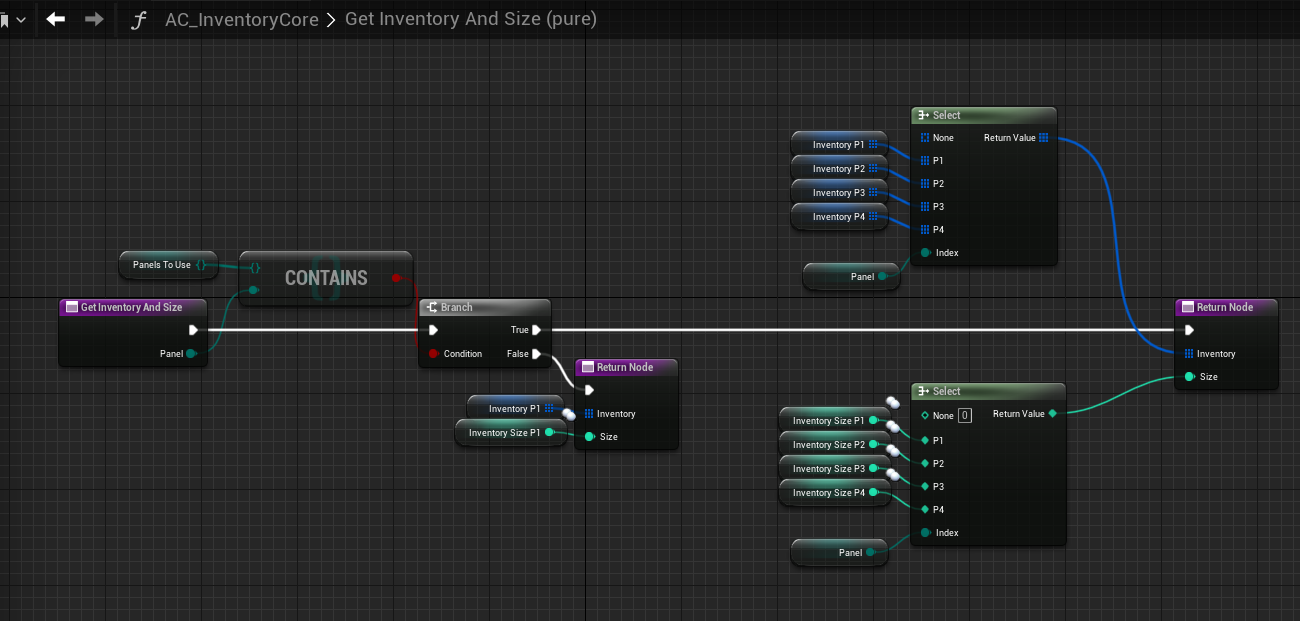 Getting Inventory Array and Size for specified Panel
 Changing Inventory Sizes in Class Defaults
 Building Inventory Array base on 'Use Inventory Size'
boolean
 Getting Inventory Array and Size for specified Panel
 Getter functions inside InventoryCore Component
 Adding and Removing an Item from the Inventory
 Checking for Partial Stack for Stackable Items
The Inventory System is managed around Components, that can
be attached to the Player or to the Interactable Actor. By
default the InventoryCore Component is added to the Actors,
which are eligible for containing and transferring the
items. PlayerInventory Component on the other hand, is
derived from the InventoryCore - it already has all the
necessary functions plus some additional ones that were
added specifically for the Owning Player. Since all the
functions/events are inherited from InventoryCore they can
be modified and extended.
Whenever an Item is picked up, bought from a vendor or
simply moved to the player inventory, it will be handled by
a special function called 'Transfer Item from Inventory'. It
works in both directions - an Item can be transferred from
Player to the Actor Inventory and opposite, main difference
is changing the Receiver and Sender Inventory Component.
When Drag Dropping an Item it is required to specify the 'In
Slot Data' input parameter. In multiplayer enviroinment you
must use a Server call of this function - Target will always
be the PlayerInventory Component.
Unequipping an Item from Equipment is handled by 'Transfer
Item from Equipment' function. Target and Sender will always
be the same. When Drag Dropping an Item it is required to
specify the 'In Slot Data' input parameter.
Inventory Component contains lot of useful Event
Dispatchers, which can be binded inside of a blueprint class
or added as Events inside the Owning Actor. They are
primarily used to communicate with widgets, for example to
Refresh the Inventory Slots. Some of them are added as
Events inside the Player Controller.
Initial Items can be added to the Inventory Component by
using 3 different methods: Adding All Items from DataTable,
Adding Single Item from DataTable, Adding Random Items from
DataTable. Items can be added to an Actor in the Level or
inside the Actor Class (that will be spawned at some point).
Each Inventory Component can use multiple Inventory Panels,
currently the Items can be splitted between 4 Inventory tabs
(P1 = Armor & Weapons, P2 = Consumables, P3 = Crafting
Materials, P4 = Quest Items/Other), it can be assigned
inside Item Class. By default only Player Inventory is using
4 panels, this can be changed inside Inventory Component
Class Defaults. Base on the enum you can Refresh the
individual Inventory Tab or Switch to the tab you just
selected (by clicking on button or pressing an input).
Inventory Component can use or not use Inventory Size, it
can be toggled in the Component Class Defaults [Use
Inventory Size] boolean. Setting it to True means the Array
will be resized and filled out with empty slots (i.e. Player
Inventory, Vendor, Storage). In this case the Inventory can
become full at some point (resulting in displaying the
pop-up message on screen). Each Inventory Panel has a
separate Inventory Size parameter to modify. Setting
Inventory Size to False means it won't have any empty slots,
the Items will be added as the next element of an array.
Currently it's used for Item Pickups, Chests, LootBags, etc.
Inventory Component can be checking Owner Gold, for
example when trading with a Vendor. The Actor already has
this option assigned as True. If the stacked Item value
would be greater than current Gold, then Transferring of
the Item will fail - function 'Has Enough Gold' is used in
that case. The base amount of Gold can be changed by
setting 'Owner Gold' parameter.
The Component can also use Inventory Weight - currently only used for the Player Inventory. Exceeding the Max Inventory Weight only changes the displaying Inventory Weight text in the widget at this moment, but this can be extended base on the project specifics.
The Component can also use Inventory Weight - currently only used for the Player Inventory. Exceeding the Max Inventory Weight only changes the displaying Inventory Weight text in the widget at this moment, but this can be extended base on the project specifics.
There are few important core functions inside the
Inventory Component. You can for example retrieve an item
from the inventory by ID, Slot Index or ItemData. You can
get the Array of Items in the Inventory or of specified
type. Find the Empty Slot and amount of emtpy slots in the
inventory. Adding an Item to the Inventory Array requires
specifying Item Data and Slot Index (to which it should be
added). Additionally before adding an item you can also
check for Partial Stack in the Inventory.
Under construction...